Photographed by John-Paul Pietrus for the November 2024 Issue of Vogue Philippines
At Show 003 of Full Spectrum Masterclass, Jelly Eugenio, Mark Qua, and Anthea Bueno give tips and tricks on improving your makeup skills.
Last year, makeup artists Jelly Eugenio, Mark Qua, and Anthea Bueno launched the Full Spectrum Masterclass, where they taught professional makeup artists, content creators, and beauty enthusiasts how to create editorial, bridal, and red-carpet makeup.
This year, the trio returns with their third iteration of the masterclass. In Show 003, the three focused on giving tips and advice for perfecting personal makeup.
Read their tips and tricks below.
Building a skincare base
To achieve this, the process begins by cleansing and gently exfoliating the skin. During the masterclass, Anthea Bueno used Happy Skin Ceramide Hyaluronic Acid Wipes to clean and micro-exfoliate by folding and wiping with small circular motions. The focus is on the foundation-prone areas, such as the sides of the nose and between the brows, where the skin usually has dry patches.
Then, she proceeds by hydrating the face with a setting spray, which also doubles as a toner. “It’s like we’re adding a bit of moisture, a little bit of a barrier,” she explains. When it comes to layering products, she explains that it’s best to go from the thinnest to the thickest, starting with the serums before creams. “We have to get products that penetrate deeper first so that they don’t get stuck on the pores,” she says.
After spreading the products, she advises patting and pressing them into the skin to help them penetrate deeper and get blood circulating. Then, she checks the skin for drier zones, such as under the eyes or around the mouth, and adds more moisture to these areas. Lastly, she applies lip oil to prepare the lips for other products.
Color correcting and foundation
Before beginning color correction, Bueno explains the different face zones and the amount of product to use on each area. For the V-zone (cheeks, chin, and jawline), the skin is thicker, so it can take more product. For the star zone (under eyes and smile lines), the skin is thinner, so there should be less product. There are also warm and cool zones on our faces, with the cool zones being the blue/purple areas around the mouth and under the eyes, while warm zones are the more flushed or red areas.
As a baseline, warm tones cancel out cool areas, and cool tones cancel warmth, while correctors can be used in the V-zone. “Sometimes we use corrector too much, then we end up looking orange… just put it on the areas that actually need it,” Bueno adds. For the foundation, she suggests matching it at the jawline.
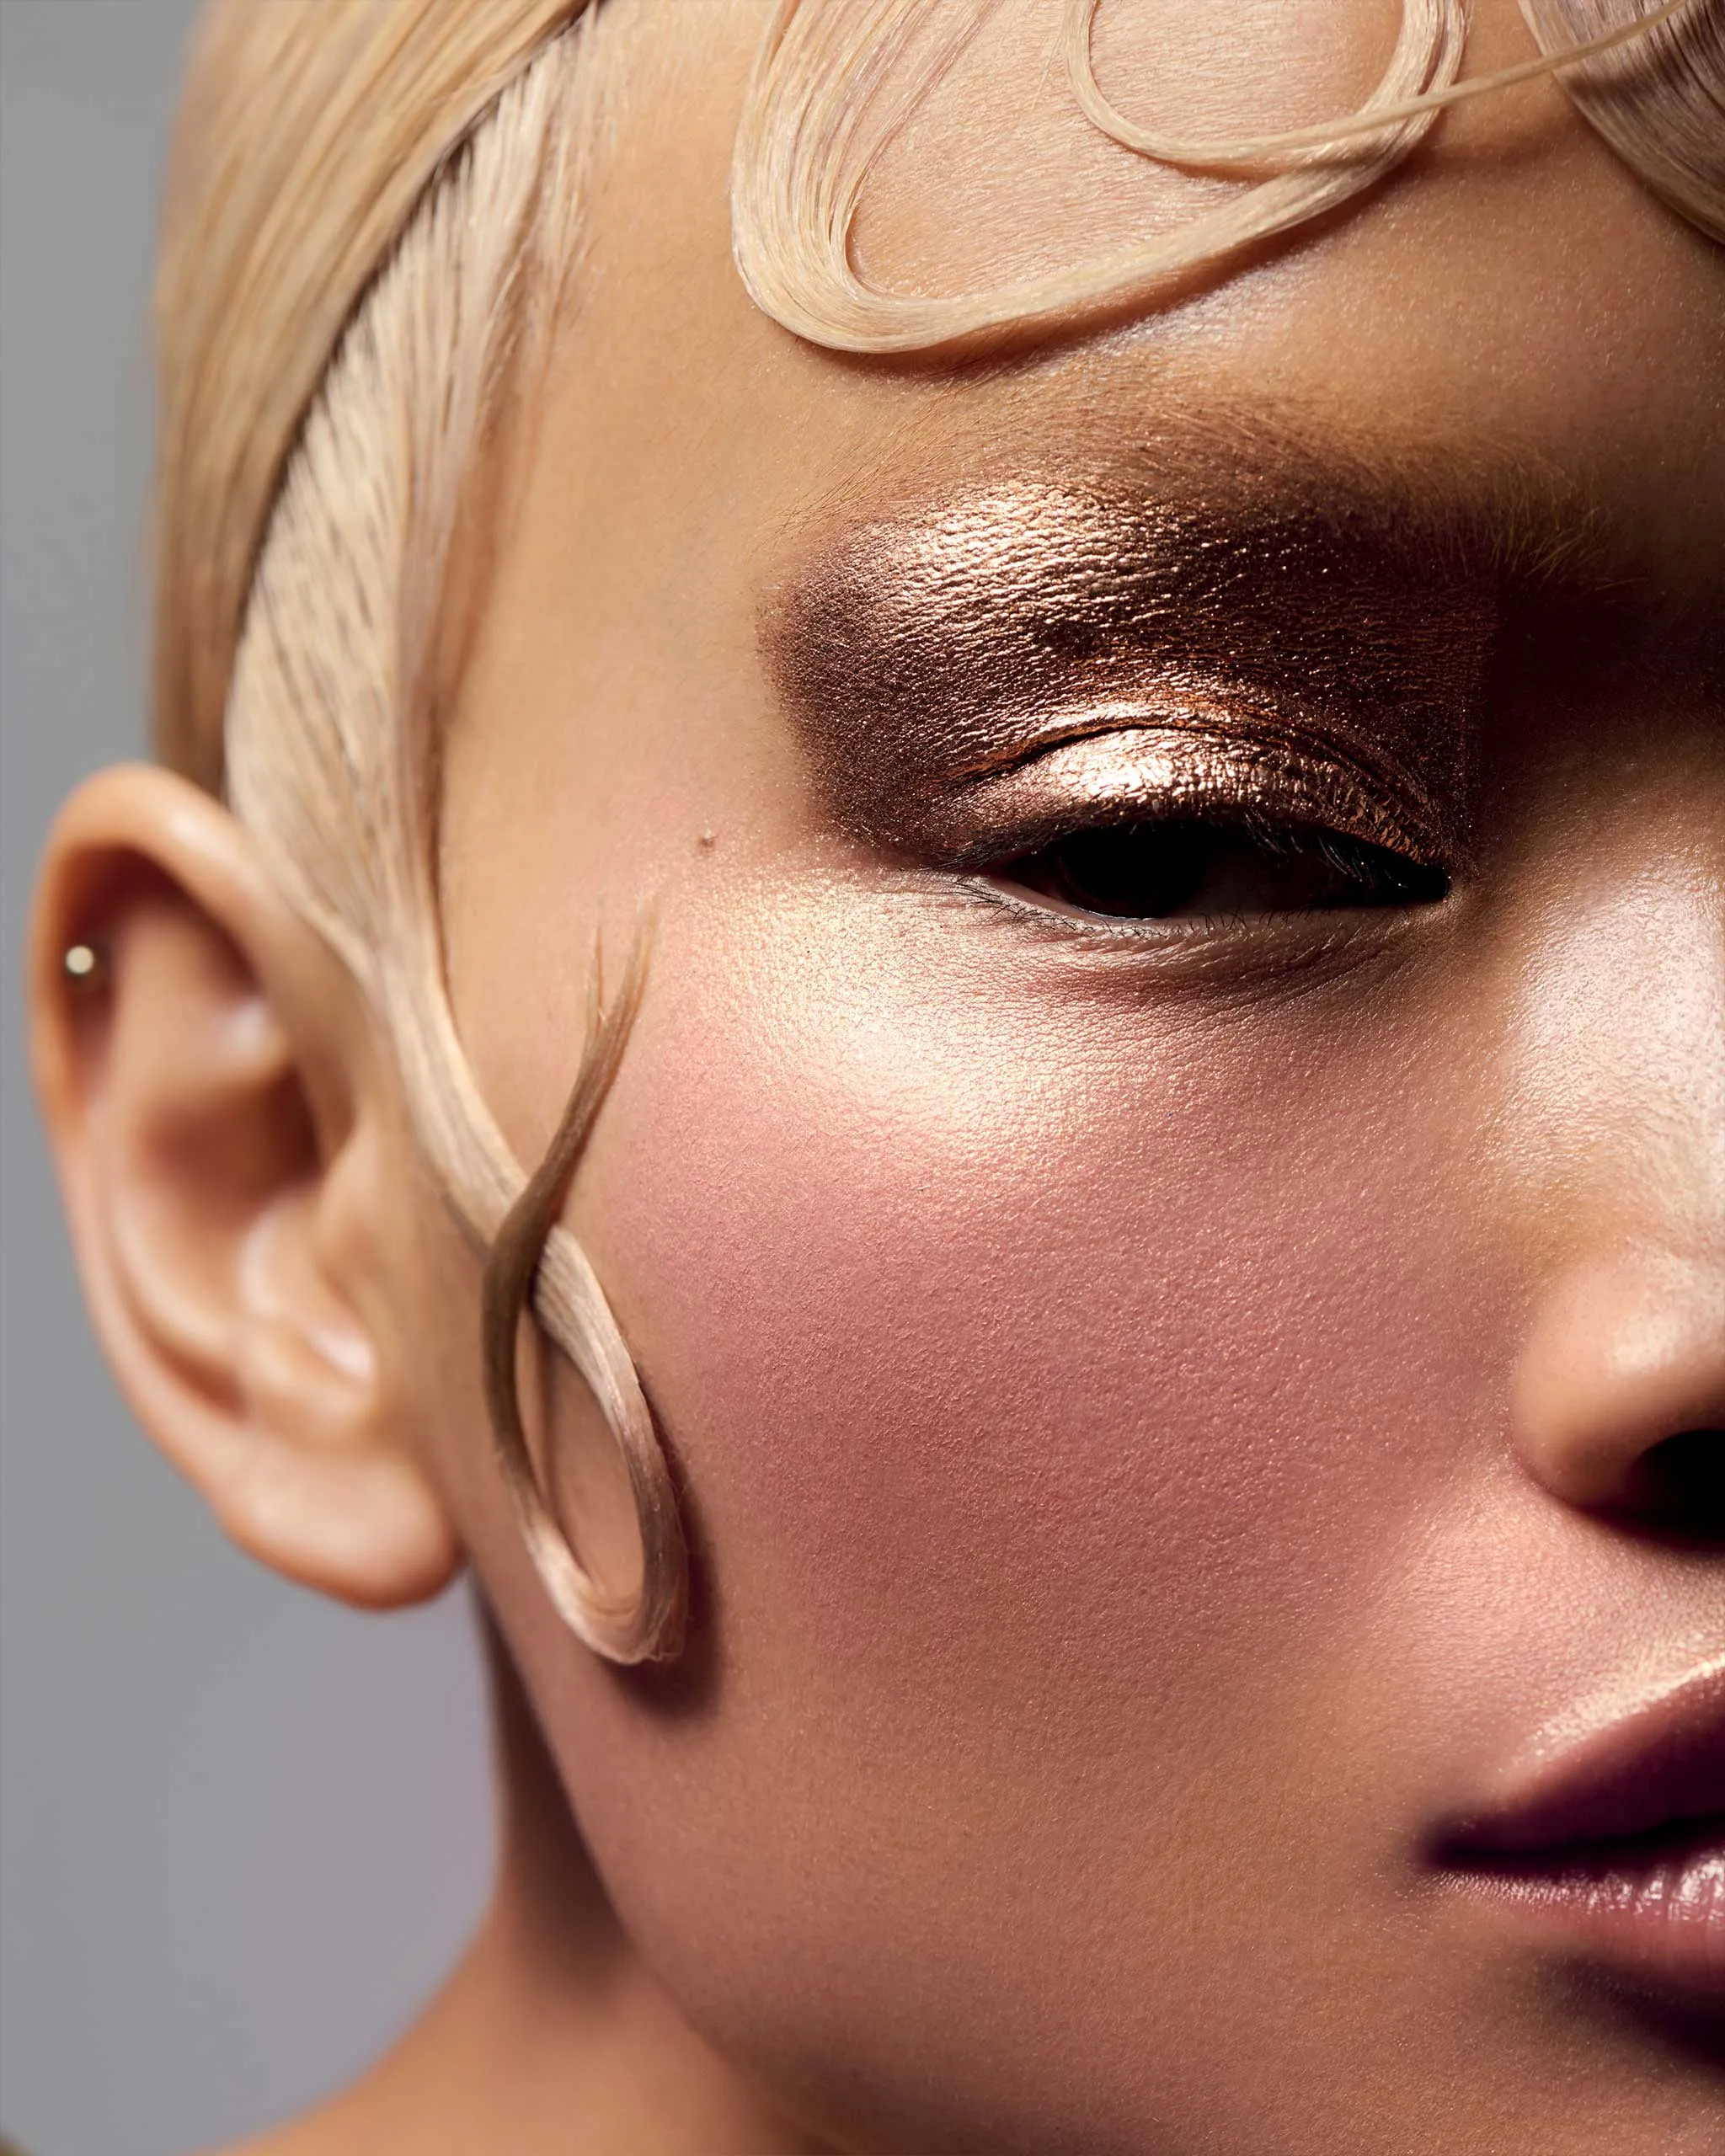
Adding contour, blush, and highlight
Contour can be scary for beginners, so Mark Qua simplifies it for those who are just starting. Instead of sucking in the cheeks and applying the contour on the hollows, Qua suggests feeling for the cheekbones and applying it directly on top, blending it towards the hairline. Then, if you want a narrower head, add some to the temple. For blush placement, Qua advises adding it to the V-zone, closer to the center of the face, and blending it upwards toward the eyes for lift. If the blush tone is too intense, you can mix it with a color corrector and adjust it to your liking. For example, Qua suggests focusing it on the cheekbone tops and the center of the nose so the glow catches the light when you turn. For all the steps, he also recommends pressing and not swiping the products to keep the placement precise and natural.
Sculpting the eyes
Before applying the eyeshadow, Jelly Eugenio lightly powders the eyelids to create an “even canvas.” For eyeshadow, Eugenio says that he likes to just have a “wash of color,” keeping the color low on the lid and matching the tones to the blush for harmony. Then, he adds shimmer to the inner corners to add brightness to the center.
For those who get nervous about eyeliner, Eugenio advises tracing the shape first with a sheer brown pen before committing to a dark liner. “When you go straight to eyeliner, there are a lot of mistakes. This way, it’s more forgiving,” he says. For the wing placement, he extends the line slightly outside the eye, then flicks it up, avoiding fully lining the eyes for a lifted effect.
For the brows, he begins by mapping the shape using facial landmarks and identifying where the brows should start or end based on bone structure. And just like with eyeliner, begin with softer, more sheer lines, then layer more if you want more intensity.
If you’re adding false lashes, pick ones that taper thinly at the inner corner so they blend seamlessly with your natural lashes. If you’re using lash clusters, place them slightly inward of the lash line for lift and to avoid drooping. Additionally, glue them to the base of your natural lashes, and leave a small gap to blend with winged liner. After attaching, curl the falsies with your natural lashes so they bind together.
Adding dimension to the lips
You can customize a lip look however you want, but for a layered, dimensional look, Eugenio has a lip combo that you can use. For the base, he uses a velvet tint all over the lips. To add depth and poutiness, he uses a darker tint in the center, then finishes the look with a gloss or lip oil on the upper lip peak and center of the lip for volume. For additional touches, adding blush and highlight can add more dimension to the look.
Setting your makeup
Before wrapping up the routine, check for any disturbed makeup areas and retouch with cream concealer before lightly setting with powder. Then, for an added bronzy look, sweep bronzer around the face; for contour, place it subtly under cheekbones and along the perimeter. Then, finish off the look by drenching the skin with a long-lasting setting spray to lock in all layers.
Photographed by JOHN-PAUL PIETRUS. Stylist: Oxana Korsun. Makeup: Liz Martins. Hair: Yoshitaka Miyazaki. Models: Amar and Ella.